Technical macro photography – Material transparency of composite for dental restoration – Product photography Melbourne
Precise control of light, reflections and color in super macro photography
The importance of accurate photography when it is used for comparison of items.
SDI has produced a wide variety of products for dentists since 1972. It is an Australian company that develops, manufactures, and sells its product all over the world.
I am very happy about photographing for them during these last 3 years. This project was quite different and quite special.
This project objective was to show the color and the amount of transparency of small samples of the composites as accurately as possible. Each small sample of the product was 0.5mm thicker than the previous one. When placed side-by-side, the dentists will be able to identify which composite and thickness is required to create the desired cover and effect.
To achieve we have to have a high level of control over the light intensity and color. This was done by keeping all lights positions and power absolutely locked during all 3 days and monitoring with a photometer that the values are what we need them to be. All our cameras, monitors, and printers are calibrated (color management studio) and our wide-gamut displays show accurately the colors (>98%).
Camera macro lenses and flashes
In addition to positioning and controlling the lights very precisely, I had to develop a method to photograph all these 240 very small 7×10 mm material samples in the same way and over the same background. I printed a few cards with the SDI logo and a line that were used as the background.
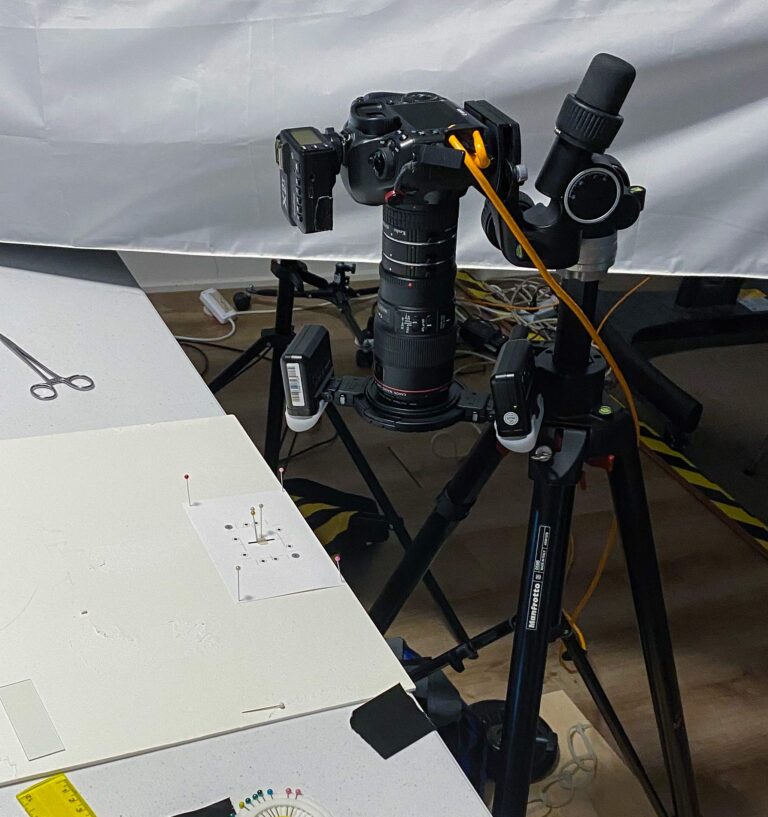
To position each of the 240 small plates, always in the same position, I used a few pins stuck on a baseboard. All I need to do is to make sure that the plates touch the pins. Easy to say but not so easy to do. It took me almost 3 days to capture all the images.
Not retouched image.
Macro Product photography Luna Flow OA2 Macro
When you are working on extremes such as super-macro photography, even the smallest change in the position of the camera or floor vibrations would affect the image and focus.
I placed an extra floor and weights to support the tripod and reduce vibrations. Even the camera shooting had to be done by remote control to reduce vibrations.
Lighting and table for macro
After capturing all images, I retouched each one manually removing surface scratches and dust spots. I took special care to maintain the original color. No individual adjustments on color tone, saturation, contrast, and luminosity were made. If one global adjustment was applied, it was also applied in the same proportion to all images. So, when you compare side-by-side, the only variable is the thickness of the material.
After retouching, I create composites (use of multiple images) based on SDI’s specs. In this case, it was a grid of images side-by-side as you can see here.
Luma 2 with Line A4 format large composite
In order to deliver the files ready to print, I printed them on a variety of paper and inspected them with the specialist dentist to ensure we achieved the precise colour and representation of the transparency on each of the composites.